THE HEALTHY HAG

I COOK … I EAT … I SHARE.

APPLE PEAR CRUMBLE February 22, 2012

Good grief has it really been THAT long???  Well, I guess it has, and I’m confident with my excuse: new motherhood.  I welcomed the best thing EVER into my life last year and it’s been one hellova rollercoasster ride since.  Poopy diapers and tantrums aside, I still love love love to cook and bake.  So that’s that.

Here’s a great recipe for one of my autumnal faves … Apple Crumble.  This version is modified to be GLUTEN FREE that has a slightly almond twist and incorporates pears as well.  It’s a quick and elegant way to use up any apples or pears you just know will go if you don’t use them soon, and is super easy to prep.  Now that time is of the essence (crazy toddler running around), making food that is healthy AND ready F-A-S-T is more important than ever.

INGREDIENTS:

TOPPING

1/3 cup sliced almonds
1/3 cup sugar
1/3 cup almond flour (or oats)
1/2 tsp. cinnamon
1/4 tsp. ground ginger (this is optional)
3 tbsp butter (at room temp)

FILLING

3 tbsp almond flour
1/2 cup sugar
1/2 tsp. ground ginger (this is optional)
1/2 tsp. cinnamon
1 1/2 pounds apples (about 4 medium sized)
1 1/2 pounds pears (about 4 medium sized)
1/2 cup dried cranberries or craisins or raisins
1 tbsp lemon juice
1 tsp almond or vanilla extract

DIRECTIONS:

1) Grease an 8″ or a 9″ square baking dish

2) Peel, core, and slice apples and pears.

FOR TOPPING:

* In a medium bowl, combine sliced almonds, flour, sugar, cinnamon and ginger

* Add butter to mixture, and combine ingredients and butter until mixture resembles loose crumbs (best to use your fingers!)

FOR FILLING:

* In a large bowl, mix together flour, sugar, cinnamon and ginger, then add apples and pears, cranberries, lemon juice and almond extract.

* Mix fruit with the dry ingredients to coat, being careful not to break up the fruit (again – best to gently use your fingers!)

3) Transfer FILLING (fruit mixture) to the baking dish, and sprinkle TOPPING mixture evenly over top.

4) Bake at 375° F for approx 30-35 min or until topping is starting to turn golden brown, and fruit juices bubble.

5) Cool slightly before serving

NOTES:

– you can serve with whipped cream or ice cream

– can be served warm or cold


Saucy Polenta Fingers December 10, 2009

After feeling like I hit a culinary wall of non-creativity (why is it that we always go back to the same old same old after a while??), I went a huntin’ in the great abbyss that is my pantry.  My prey?  Turned out to be a big fat zippy filled with cornmeal.  Enter… inspiration!  I’ve made both the store bought and homemade kinds before, but I wanted to jazz this lil diddy up, so I made this into fingers.  Cooled ’em, cute ’em, grilled ’em, then smothered ’em in sauce.  Outcome?  A brilliantly cheap, quick, hearty and luscious winter-time meal.  Bonus was the totally gluten-free day I had!  Woot!

.

INGREDIENTS:

For the polenta –

4 cups water

3 1/2 cups of milk

2 tsp salt

1 1/2 cups cornmeal

1/2 tsp dried basil

1/3 cup grated Parmesan cheese

1 tbsp butter (I used unsalted)

For the sauce –

2 tbsp olive oil

1 medium onion, diced

3 garlic cloves, minced

2 cups fresh green beans, trimmed and chopped into 1 inch pieces

2 cups diced canned tomatoes

1 tsp EACH dried parsley and dried basil

Salt and pepper to taste

.

DIRECTIONS:

1. Bring water and milk to a boil in a medium pot, then turn down to a simmer – watching closely so you don’t burn the milk.

2. Add cornmeal  into pot in a slow stream, stirring, then add dried basil and salt, and continuing to whisk for about 2-3 minutes.

3. Continue to simmer on low heat for about 15 minutes more – polenta will be gloppy and stiff, but try to keep stirring so the bottom does not burn, then remove from heat.

4. Mix in Parmesan cheese and butter, then plop into a greased 9×11 baking dish and cool for at least 30 minutes until completely solid.

5. While polenta is solidifying, in a large skillet heat oil over medium heat, and saute onions until translucent, then add in garlic and cook until garlic is fragrant and slighly browned (about 1-2 minute).

6. Add canned tomatoes and dried spices (and salt and pepper to taste), simmer for 5-7 minutes, then add in diced green beans and cook until tender – about another 5 min (simmer sauce on low until ready to use).

7.  Slice soild polenta into fingers, remove fro baking dish, and grill in a grill pan until heated and slightly browned (you could also broil in the oven, turning so all sides are browned).

8. Place grilled polenta fingers on a plate, and cover with sauce – sprinkle with parmessean and serve HOT!


Healthy Peach Muffins August 27, 2009

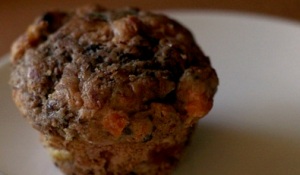
It’s that time of year again where the fruit basket on the counter and the top shelf in my fridge is overrun with peaches.  Glorious, mouth-watering, chin dripping fresh Ontario Peaches.  Unfortunately, there are only so many I can eat in a day, and so I have had to find creative ways of using them all up.  Enter baking!  These are a healthy alternative to the usually fat-laden muffin realm, and if you’re feeling like you’re not in the peach zone, you could easily swap any berry of your choice here.  The fat here is replaced mostly with yogurt, so it’s a bit friendlier to your hips and tummy.  This batch was even 100% kid approved by my discerning neighbours, 8 and 5 respectively, and by my Grandpa, 89.  Now if that’s not an endorsement, I really don’t know what is.

.

INGREDIENTS:

2 cups flour (I used 1 cup rye flour, and 1 cup all purpose – but you could use rice or chickpea flour to make this Gluten-free)

1 & 1/2 tsp baking powder

1/2 tsp baking soda

1/4 tsp cinnamon

1 cup low-fat plain yogurt (you could use full fat or even peach flavoured if you want)

1/4 cup 1% or skim milk

2 large eggs

3/4 cup sugar

1/4 cup salted butter, melted

1 & 1/2 tsp vanilla extract

1/2 cup chopped walnuts or pecans (or even almonds)

2 cups fresh peaches, cut into very small pieces (skin on)

.

DIRECTIONS:

1) Preheat oven to 350°F, and place paper baking cups in muffin pans (or lightly grease pans).

2) Combine flour, baking powder, baking soda and cinnamon; set aside.

3) In a separate bowl, combine milk and yogurt; set aside.

4) Beat eggs and sugar at high speed for about 3-5 minutes, until light and fluffy, then add melted butter and vanilla and beat until well blended, about 1 minute.

5) Add flour mixture alternately with milk mixture (start and finish with flour mixture), mixing only to completely combine, then stir in chopped nuts and peaches. DO NOT OVERMIX!

6) Spoon batter into prepared muffin pans, and bake on centre rack for 25-30 minutes (or until cake tester comes out clean).

7) Remove finished muffins from pans immediately, and cool on wire rack.

peach-muffin


Oh-so-oat-cookies! August 6, 2009

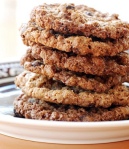
Why OH-SO?  Well, these little gems are OH-SO guilt-free, soy-free, easy to make, can be dairy-free, and if you use non-Quaker brand oats, they’re gluten-free too!  And they’re OH-SO tasty, believe it or not. Plus, they’ve got the added bonus of the bananas, so they’re super healthy and a great way to use up any over-ripened bananas you may have lying around.


Ingredients:
3 medium ripe bananas, mashed
1/3 cup butter, melted (you could also use CANOLA oil to make these dairy-free)
2 cups uncooked quick-cooking oats (NOT Quaker or other conventional brands, if you want gluten-free)
1/4 cup skim milk (use RICE or ALMOND milk to make these dairy-free)
1/2 cup raisins
1/2 cup walnuts
1 tsp vanilla


Directions:

1) Heat oven to 350°F, then puree bananas completely, until they are runny and smooth.

2) Thoroughly mix ALL ingredients together in a bowl, ensuring oats are evenly moistened.

3) Let batter stand for about 5 minutes, then drop heaping teaspoons onto a greased cookie sheet.

4) Bake cookies for approximately 15-20 minutes or until cookies are lightly browned (every oven is different so keep a watchful eye near the end).

5) Move cookies to a wire rack to cool.


NOTE – if you make these super-sized, they make terrific ice-cream sammys.  Just scoop vanilla icre-cream and squish between 2 cookies, and freeze for an hour before serving.  Smother with chocolate or caramel sauce for a real gooey mess if you want.  Tastes like summer!!!

oat


Peanut Butter Choco-Chip Squares

I live and breathe peanut butter!!  I swear, if I ever get a nut allergy I am doomed.  Every day for as long as I can remember, I’ve had nuts in some shape or another.  Nothing makes me instantly cheerful like a big spoonful of my fave PB (okay, maybe a glass of wine, but that’s another story).  These bars are not only delectable, they are packed with good-for-you ingredients that you most likely already have on hand.  If you are looking to cut back on some calories, you can use Splenda, but I prefer the real thing.  To make these dairy-free, sub in ALMOND or RICE milk and use dairy-free ‘chips’ as I’ve done.


Ingredients:

¾ cup whole wheat pastry flour

¾ tsp baking soda

pinch of salt

1 cup natural peanut butter (smooth or crunchy – your call)

1/3 cup regular brown sugar (or Splenda Brown Sugar Blend if you are calorie counting)

1 egg, beaten

½ cup skim milk

1 tsp vanilla extract

½ cup chocolate chips (I used Enjoy Life chips – which are dairy and soy free! Yay!)


Directions:

1) Preheat the oven to 350°F, and coat an 8″ x 8″ baking dish and lightly brush with oil (coat with cooking spray).

2) In a large bowl, combine flour, baking soda, and salt, and gently stir with a fork.

3) In a separate mixing bowl, combine peanut butter, sugar, and egg and stir vigorously until creamy, then add milk and vanilla and stir until smooth.

4) Add the flour mixture to wet mixture, stirring until well combined, then mix in the chips.

5) Place dough into prepared baking dish and pat top lightly until smooth, then bake for about 15 min, or until slightly puffy and very lightly browned at the edges.

6) Remove from oven and allow to cool for at least 10 min before cutting.

NOTE – you can add in oatmeal, raisins, coconut flakes, etc if you wish … totally up to you!pb


Quinoa Egg Bake March 26, 2009

For all you quiche lovers that just can’t handle regular crust – here’s the answer to your prayers!  The quinoa in this recipe gets baked in the oven so it doesn’t even need to be precooked. It just settles into the bottom of the pan and creates a moist, crunchy crust.  Lots of protein and spinachy-goodness make this a super-healthy meal that takes no time to prep … that’s 100% gluten-free!


INGREDIENTS:

1 tsp butter

1/2 cup uncooked quinoa

6-7 eggs

1 1/4 cups milk

1 tbsp chopped garlic (about 3 large cloves)

1 tsp thyme

1/2 tsp salt

1/2 tsp pepper

2 cups packed baby spinach, roughly chopped

1 cup finely shredded Parmesan or old cheddar cheese


DIRECTIONS:

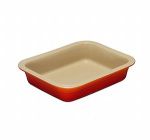
1) Preheat oven to 350°F, and grease an 8 x 8 in. glass (or a Le Crueset – my personal fave dish ever – see image) baking dish with butter; set aside.

2) Place quinoa into a fine mesh strainer and rinse until cold running water until water runs clear, then drain well.

3) In a large bowl, whisk together eggs, milk, garlic, thyme, salt, pepper and quinoa, stir in chopped spinach, then pour mixture into prepared dish.

4) Cover dish tightly with foil then gently pound or jiggle dish from side to side so that quinoa settles on the bottom in an even layer.

5) Bake until j

ust set, about 40 minutes.

6) Remove foil, sprinkle top evenly with cheese, then return to oven and bake, uncovered, until golden and crisp, about 10 minutes more.

7) Set aside to let cool briefly, then slice and serve.

le-creuset1


Easiest Protein Bars in the Universe! November 13, 2008

It’s quite a claim, but I am usually true to my word.  Usually.  These only have a few ingredients, which you can add to with your own favourites, and they are NO BAKE.  That’s right … no preheat the oven to any degrees.  Plus, you;ll probably only use 1 or 2 bowls so clean up is less painful than most baking adventures.  Sweet protein goodness!

INGREDIENTS:

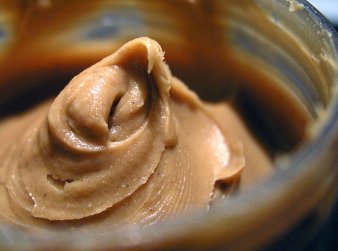
1 cup all natural smooth peanut butter

7-8 tbsp honey (or split with maple syrup)

1 cup protein powder (I used chocolate)

1 cup oats

2 tbsp flax seed

DIRECTIONS:

1) Mix the peanut butter and corn syrup together in a microwavable bowl, and microwave on high for 75 seconds.

2) Remove from microwave and add the remaining ingredients to the bowl, stirring to completely combine.

NOTE – You may need to add a bit of water to ensure the mix is not too dry.  It should be the consistency of Play-Dough.

3) Spoon into a square pan (push to flatten evenly) and cool in fridge for 15 minutes.

4) Slice into bars and wrap with plastic wrap and ENJOY!

TIP:

Add any chopped nuts, shredded coconut or dried fruit (such as raisins) to the mix for an added boost.

peanutbutterpreview


Protein Muffins September 25, 2008

This recipe screams healthy and delicious, and I made extra brownie points with my gluten-free tri-athlete gal pal when I forwarded it to her. They are a wonderful low-carb, high-protein, super tasty power muffin. Spread some all natural nut butter on the top before eating for extra flavor and an even bigger protein boost.

Ingredients:

1 1/2 cup oat bran or non-gluten flour
1 cup egg whites (from container) or 6 egg whites
1/2 cup canned pumpkin
1/2 cup applesauce w/ cinnamon (or plain but add a bit more cinnamon to the batter, to taste)
2 Tbsp peanut butter (all-natural is best)
extra dash of cinnamon & nutmeg
3 tbsp of honey
1 banana, mashed
1 cup frozen blueberries
extra peanut butter (or any nut butter – to spread on top before eating)

Directions:
1) Preheat oven to 375 degrees, and place muffin liners in a 12 serving muffin tray.

2) Mix all ingredients together until blended – although add the blueberries at the very end so they don’t become overly mashed.

3) Fill muffin cups 3/4 full and bake for 20 min.

4) Let muffins cool completely on rack, then spread nut butter on them before eating.

Store in refrigerator, or freeze for a month (well wrapped).

Yummers!!


Blueberry Buckle August 13, 2008

An old-fashioned dessert with a modern VEGAN twist. This goes amazingly with ice-cream or a dollup of home-made whip cream (obviously not vegan at that point then). Use spelt or rice flower to make nice with your gluten free friends.

INGREDIENTS:

TOPPING –

3/4 cup whole-wheat pastry flour or spelt flour

1/3 cup sugar

1 tsp cinnamon

1/2 tsp baking powder

1/4 tsp salt

5-6 tbsp canola oil

CAKE –

1 cup whole wheat pastry or spelt flour

1 cup regular flour

2 tsp baking powder

3/4 cup maple syrup

1/3 cup canola oil

2 tsp vanilla extract

1/2 tsp salt

4 cups fresh blueberries, washed and dried

DIRECTIONS:
1) Preheat oven to 350F and grease a 9-inch spring-form pan ( you can also wrap bottom with foil for easier removal).

2) Topping: Combine flour, sugar, cinnamon, baking powder and salt in bowl and stir in oil 1 tbsp at a time until mixture looks crumbly (you may not need all the oil).

3) Cake: Sift flours and baking powder into bowl, and in a separate bowl whisk together syrup, oil, vanilla and salt.

4) Stir syrup mixture into flour mixture, then gently fold in berries.

5) Pour cake batter in prepared pan, then sprinkle topping over top.

6) Bake for 70 minutes, or until toothpick inserted in center comes out clean.

7) Cool for at least 30 minutes on wire rack, then unmold, and serve.

NOTES:
– dash a few blueberries around the ‘buckle’ when plating
– drizzle a few drops of maple syrup or honey over top for that really sweet tooth of yours
– can be re-heated slightly in the micorwave
– freezes well ONLY if cooled completely, then securely wrapped in plastic (but only for a few weeks tops)


Lemony Loaf February 13, 2008

A dense, quick and tasty loaf smothered in a lemony glaze. Yummers! You can make these into muffins as well. Freezes brilliantly! My all time favourite loaf/cake. Incredible.

9184.jpg

INGREDIENTS:
1 1/2 cups rice flour (I used brown rice flour)
1 tsp baking powder
1/2 tsp salt
1/2 cup butter, softened
1 cup white sugar
2 eggs
grated rind of 1 medium lemon
1/2 cups milk (I used rice milk)

Glaze:
juice of 1/2 lemon
1/4 cup white sugar

DIRECTIONS:
1. Preheat oven to 350 degrees F (175 degrees C) and lightly grease a 9×5 inch loaf pan.
2. In a large bowl, combine flour, baking powder and salt.
3. Add butter and cream together.
4. Beat in sugar gradually until light and fluffy.
5. Stir in eggs one at a time, beating well with each addition.
6. Mix in the lemon zest and combine.
7. Stir milk gradually into the main mixture, and pour batter into prepared loaf pan.
8. Bake in preheated oven for 50 to 60 minutes, until a toothpick inserted into center of the loaf comes out clean.
9. Mix lemon juice and sugar and spread over top of loaf immediately (you can poke holes all over the loaf if you want the glaze to seap inside)
10. Allow bread to cool for 10 minutes before removing from pan.
11. Slice and serve.

Notes:
You can also make this into 3 mini loaves or a dozen medium sized muffins.